Monday, September 19, 2016

RENOGY SOLAR PANELS & GOAL ZERO YETI 400 FOR RESIDENTIAL USE!


It all started with a simple camping trip to the Adirondacks this pasting summer. Truth be told, we camp in tents but with all of our high end gear, it more glamping. This year we decided to add a little more electrical power to maintain the air mattress pressure and charge the cell phones. We also had to bring some breathing treatments for one of our kids so we wanted to be ready. 

After much reading and research, I came to the conclusion that the Goal Zero Yeti 400 would meet out needs. Basically a power pack that uses 12V, 33AH sealed lead-acid battery (AGM). It stores 400Wh for use. Here is some neat info on how many times certain devices could be charged over the lifespan of the 400Wh. 
HOW MANY TIMES WILL OUR BATTERIES CHARGE YOUR DEVICE?
Charges:Switch 8Flip 10
Guide 10 Plus
Switch 10
Venture 30
Flip 30
Sherpa 50Sherpa 100Yeti 150Yeti 400Yeti 1250
Headlamp (4 Watt-Hours)2 Charges2 Charges5-10 Charges12 Charges25 Charges37 Charges100 Charges300+ Charges
Smartphone (5-7 Watt-Hours)1 Charge1 Charge3-5 Charges7 Charges14 Charges15 Charges30+ Charges100+ Charges
GoPro® (5 Watt-Hours)1-2 Charges1-2 Charges5 Charges9 Charges18 Charges25 Charges70+ Charges200+ Charges
Digital Camera (8 Watt-Hours)1 Charge1 Charge3 Charges5 Charges10 Charges12 Charges20+ Charges100+ Charges
Tablet (25-42 Watt-Hours)25% Boost25% Boost1 Charge1-2 Charges2-4 Charges6 Charges10+ Charges45+ Charges
Laptop (50 Watt-Hours)N/AN/AN/A1 Charge1-2 Charges1-2 Charges3-5 Charges20+ Charges

It can be charged several different ways: the wall (regular outlet), car battery, or the sun. Since we are camping I thought it would be nice to go solar. Goal Zero offers a few fancy travel solar panels, the largest one being 90Wh and a but pricey. After some research, there was a better and cheaper alternative, Renogy 100Wh 12V Monocrytstalline panel. Although this panel is a bit bulky, 48" x 22",  it cuts the charging time into half when compared to the smaller Goal Zero panels. 

Once at the camp, we used the generator to inflate the mattresses and then I hooked up the solar panel to it to charge. Something happened between the start of the charging to the time I tried using it later that evening. After a little investigation in the user's manual I came to find out that some fuse was blown and the only way to fix it is to send the device back to the manufacturer. So there went my amazing experience having some extra electricity at camp. Thanks to Mike, a friend camping with us, who had invested in an inverter to use from the car battery and saved us a few times when we need to put more air into our air mattresses. 

After 3 weeks of turn around time for Goal Zero to send me another new device, I finally have the generator to use again.

The batteries in this generator work best if they are charged all the time and never allowed to go below 40-50%. So the option was to store the device in a closet and charge it every 3 months or figure out a way to use at home. So this is how I came about to setting up a single Renogy solar panel to a Goal Zero Yeti 400. 

In our part of the hemisphere, the panel had to be southern facing, and for us that meant the front of the house. I was debating on placing it on the porch roof however, the longer the chord you have between the panel and battery the more energy you lose. In fact the science behind it is, 1Wh per foot of wire. Since I would need at least a 15-20 ft chord, I could lose 15-20Wh of precious energy. Therefore I made a direct connection to the wall with a 6 ft. chord. 

THINGS YOU WILL NEED:
stainless steel 5/16 bolts, nuts, washers
galvanized steel L posts
drill
MC4 adapter
MC4 adapter extension chord
caulk
zip ties

I zipped tied all of the L posts into place and mounted the panel to see if the railing could take the weight. Everything looked well. So then I went and permanently mounted and secured everything into place. It did take a little more time than originally anticipated but it was worth spending 3-4 hrs on something that can be used every day.

I built this mounting system in order to change the angle of the panel throughout the year. If you 20-40 panels on your roof the angle doesn't matter so much because of the minimal energy lost per panel.  For a single panel however it can be a 5-10% energy lose and I wanted to be efficient. I also found a website that showed the specific angle of the panel for certain times of the year. By adjusting two bolts I can change the angle 4 times a year in under 5 minutes.


I placed a some pipe insulation around the extension wire to protect from the elements but mostly from the constant sunos that part of the house. The MC4 extension wire didn't have much insulation. 


Its always nice to caulk the hole before you forget about it and lose some heat/cool to the outside. 


Easy set up with the generator in a convenient spot for charging all of our devices. Just another way to use less electricity from the grid. 


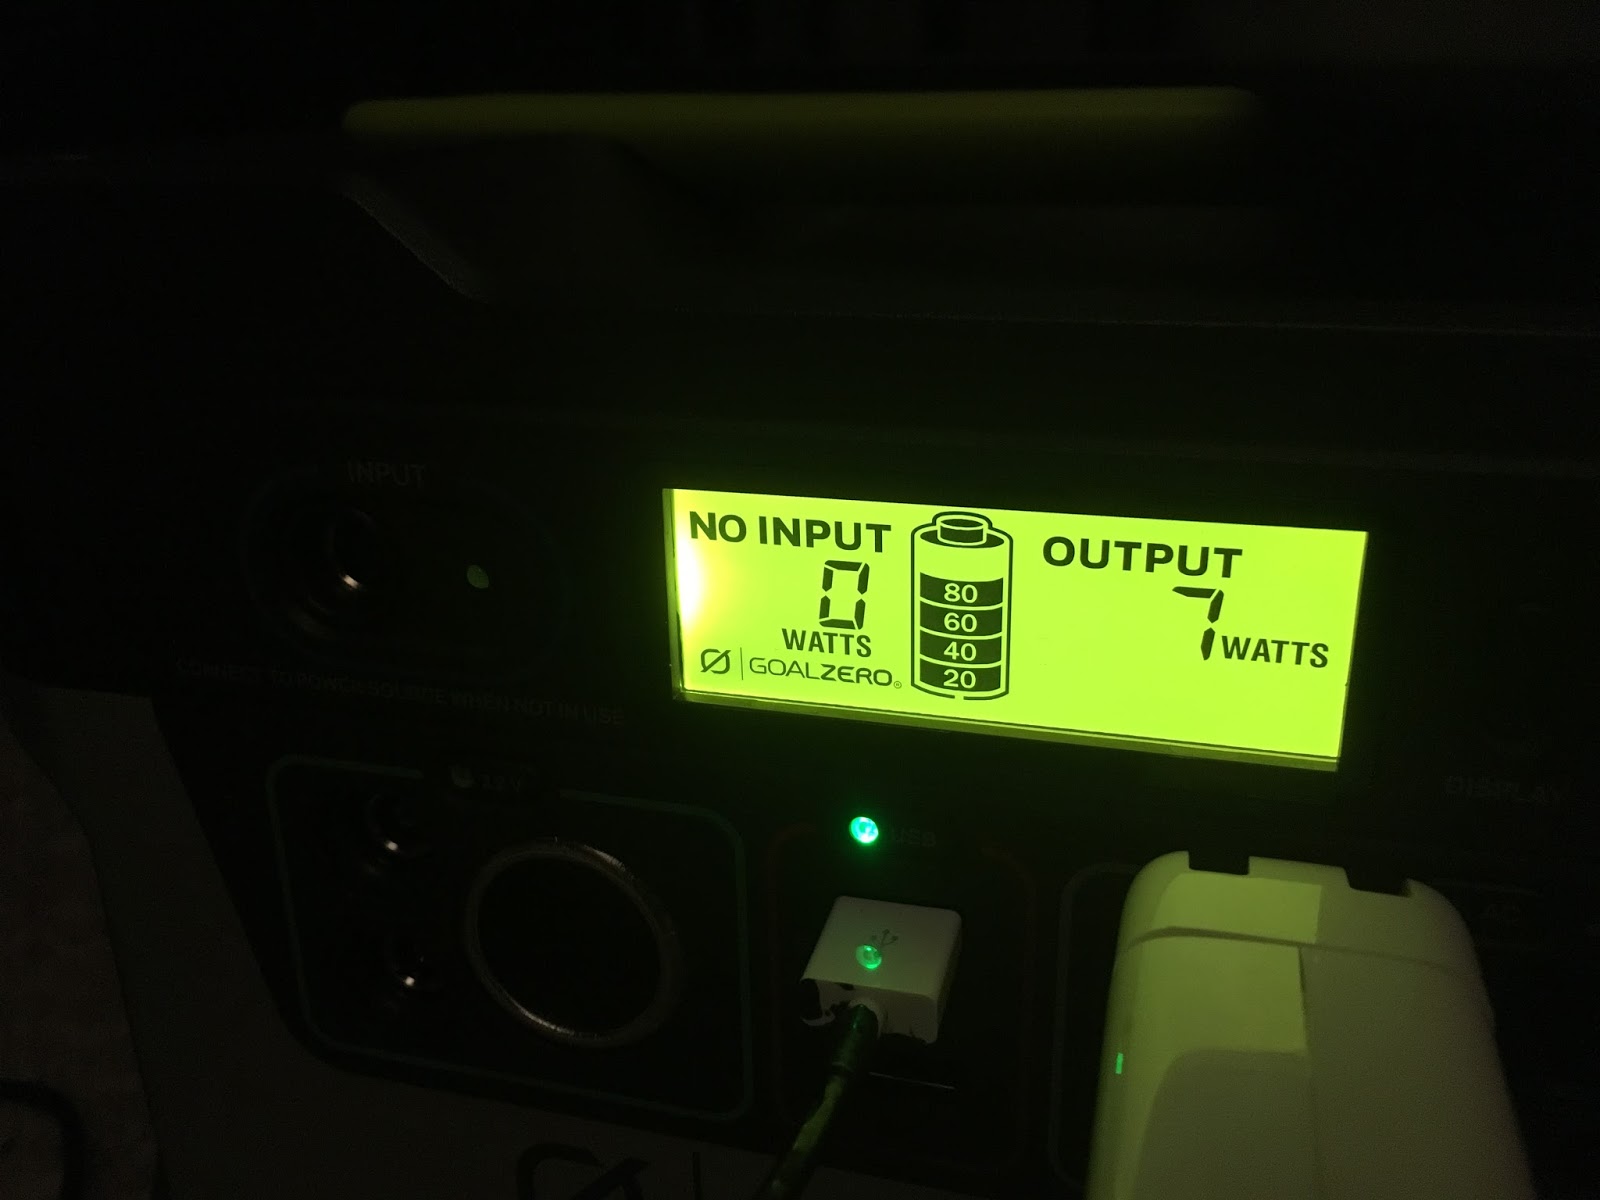
Surprisingly most of the things that we charge don't take that many watts. Looking forward to many more charges. 

Maybe one day we will go all solar. After an close cost analysis we use very little electricity for it to actually be beneficial. It would only benefit us in 11 yrs when the system is pain off. 

Sunday, September 18, 2016

JONAMAC APPLESAUCE!


One of my favorite times of the year is almost here, autumn. Recently when we went apple picking to Beak & Skiff Orchards it didn't feel like fall was around the corner with 80 degree weather. 

This was our first time picking Jonamac apples for eating and applesauce. They are known for being juicey and tarty. So this year I decided to make sauce from individual apple types inside of mixing 2-3 different apples. Also after doing some more recipe reading I decide to make 2 batches with slightly different ingredients.


While in the orchard I noticed that the apples were really small in size. One of the workers explained that the drought this summer influenced the size of the apples. This size however, made for an ideal eating portion size for myself and the kids. 


We really walked around several rows to find the largest apples for the sauce. And Adrian really enjoyed picking a few from the low branches and eating a couple as we rode the tractor back to the cashier. 


Lesya and I were really surprised at the amount of wax on the apples. After soaking the apples in the Young Living Fruit and Vegetable Wash for 10 minutes, we still had to really polish the apples with a paper towel to remove all of the wax. Removing the wax wasn't as important for the apples that we were peeling for the sauce. 


Although most recipes don't call for chopping the apples into smaller pieces, I feel like it takes less time to cook if the apples are smaller. 

BATCH #1 Recipe

4 lbs chopped apples
1/2 cup dark brown sugar
1 tsp of Kosher salt
1/2 cup water

BATCH #2 
4 lbs chopped apples
1/4 cup dark brown sugar
1/4 cup white granulated sugar
1 Tbsp Kosher salt (way too much: recommend 1 tsp)
3 Tbsp lemon juice

Place all ingredients into a Dutch oven pot and cover it up. Cook at high heat until it starts to boil. 

Turn to medium heat and leave pot open. Stir frequently. 

Cook for 45-60 minutes or until most of the apples turn a brown color. 

I used a food mill to make a less chunky texture. And cook for an additional 10 min. 


Get your quart or pint half jars ready. I like the wide mouth jars for easy pouring when filling and easy scooping when serving. Pour into jars. Label. And store for the winter months to come. 

The next apple we are looking forward to is the Gala and Honeycrisp. 

Saturday, August 27, 2016

CANNING GREEN & YELLOW BEANS!

The whole idea of canning green beans started last year when a colleague of mine brought a jar of beans for me to try. At the dinner table my wife and kids licked the jar clean because they were that good. So this year I asked for the recipe and here it is:

Ingredients:
4       pints or 2 quarts (2 lbs) of green/yellow beans
1/4    cup of canning salt / kosher salt
2 1/2 cups vinegar
2 1/2 cups water
1       tsp cayenne pepper
4       cloves garlic
4       heads of dill

Best place to get some nice beans is to go the local farmers market. Most of the time the deals are much better than in the store. 

I doubled the green bean portion and decided to try using the same recipe for yellow beans. It will probably be a month or two before we open the first jar.

1. Combine the salt, vinegar, and water in a large saucepan and bring it to a boil. While it boils, the beans can be prepared. My wife gave me a hand in prepping the beans since we had 12 quarts and it does require some time to individually cut each end of the bean. 


2. Prior to working on the beans, the jars and lids were washed and placed in the oven to be sterilized at 200 degrees for 20 minutes.   

3. Also set the canning pot filled with water to be heated up to a boil sometime prior to preparing the beans because it does take a few minutes to boil that much water. 


4. Wash the beans nicely. Trim the ends of the beans. When trimming the longer ones, trim them so that there is 1/4 inch from the top of the lid. I also learned that its easier to if you sort and separate the short and long beans right away. Its easier to pack the jars later.  

5. Pack the jars with 1 clove garlic, 1 head of dill, and instead of adding 1/4 tsp of cayenne pepper to each jar, I divided it up among 4 jars.


6. By this time the vinegar marinade should be ready by now to ladle into each jar. Fill each jar to 1/4 inch from the top. After each jar was filled I closed it with the lid. 


7. This time I decided to go about the proper way of canning. I bought a large pot with the jar holder and an individual jar holder. Make sure that about 1-2 inches of water is covering the top of the jars. Boil the jars for 10 minutes. 


Remove the jars and place on kitchen towels. Allow them to sit for 24 hrs so that they can properly cool and then be stored. 

Thursday, August 18, 2016

BLACK BEAR MOUNTAIN ATTEMPT

We hiked Bald Mountain (Rondaxe) so many times in the years past, I was ready to try a new peak with the kids this year. Black Bear Mt. is only 4 miles from Limekiln campground. The only thing that I didn't know was the distance. To my surprise it was 2.2 miles one way, making it a 4.4 mile round trip. With the youngest 3 years old and the oldest 7, we decided to give it a try anyway. The weather was favorable with overcast skies, low 70's and a bit humid. Most of the kids were excited about the hike so off we went. One hundred yards into the hike we heard the first complaint and wishes to be carried were quickly expressed. But we kept moving and we were making good progress. 


A little over half a mile into the hike we came to this intersection, but we decided to stick to the yellow trail even though it was a bit longer. 


Around this area we also ran into a couple that was also camping at Limekiln, originally from Manilus, NY. The kids really got excited and started to chat with them and basically tell them everything about their family. While hiking together, the guy spotted a toad in the leaves and held it up for everyone to touch and look at. 


It didn't take very long after the toad petting experience, it started to drizzle. We continued to hike even though the drizzle had turned into a more steady rain. We also came across some muddy sections in the trail, and the kids being unexperienced hikers got themselves pretty dirty. It wasn't terrible but we knew some cleaning was needed when we returned to camp. 

With the rain coming down hard at this point, we decided to turn around at the 1.5 mile mark and head back. Mike and I let the youngest kids ride on the shoulders so the the could make better process on the way back. 


During the return trip we really learned who the true hikers were in the hiking party. Mike and I made some mental notes for future hikes. Three out of 5 were definitely troopers, Adrian was one those. He was a bit disappointed when we had to turn around. He enjoyed getting rained on, getting muddy, and of course ridding on daddy's shoulders. 


All in all we hiked 3 miles total. It was great little hike with some experiences that I hope they will treasure and I hope they learned some new things for future hikes. I'm super excited to take my little man hiking to the high peaks in a few years. 

Wednesday, August 17, 2016

BOATING ON BIG MOOSE LAKE, NY

A few years ago, my family enjoyed a wonderful dinner at the Big Moose Inn, which is located next door to Dunn's boat service. When hanging out at the lake's edge, we enjoyed the views and casually discussed possibly renting a boat sometime the future when camping at Limekiln. This year while camping with our friends, the Marano family, we spent most of the day on Big Moose Lake. 

From the time the reservation was made to the end of the day when we returned the boat, Dunn's boat service was wonderful. They had a nice selection of pontoon and speed boats. We got a 2014, 13 seat pontoon boat. It had more than enough room for all of us to hang out, including the dog! 

During the course of the day we spent some time fishing with the kids. Actually catching a nice big mouth bass and a couple perch. We also spent some time anchored near the shore for some swim time and lunch. It was also nice to cruise around the perimeter of the lake and the nice homes and camps that dotted the shore line. Although you could see the other end of the lake, it's a decent size lake that could easily take a full day to explore and enjoy. 


Back at the dock for a bathroom break

All the kids took turns driving

Hanging out with my boy

Lesya enjoying a comfy spot and some shade

Captain Adrian

Jumping off the boat


Mr. Mike trying to get some smiles

First time driving the boat!

Wasn't super powerful, but got us around!

Relaxing after the swim

This kid loved the boat

Mike teaching the kids how to properly hold a fish he caught

She's a pro!

(LS Photography) Some coloring time


Everyone fished! 5 kids with rods made it very interesting 

At the wheel! I got enough driving time to not want my own boat! Its so much better to just rent and give it back!


Master fisherman!